
Ending thoughts on how to draw chibi
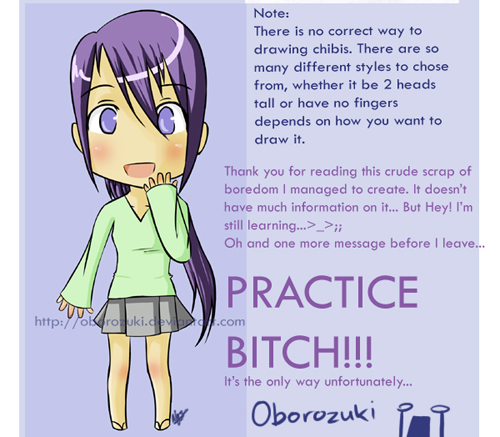
There is no universal rule that can tell you how your chibi people should look – it all depends on your style and creativity, as it is your talent that will make you competitive in comparison to other chibi artists. The more you personalize your art, the bigger the chances are you’ll be acknowledged for your chibi characters.
Some chibi characters are small and round, while others are tall and slim. Yours should be the way you prefer them to be, including a version of the two, or a messy mixture between them. Before you’ve finalized the project, try various styles, and look for the one that comes closest to your vision. Your chibi style is your choice. You can create cute chibi drawings or deformed chibi styles.
However, remember that well-drawn chibi characters are nothing alike wobbly doodles, so take proper care of every detail! We wish you a lot of success, and remind you to enjoy every step of the process!
If you liked this article on how to draw chibi, you should check out these as well:
- The Best Drawing Tutorials: Learn How To Draw
- How to draw anime: learn to do anime drawings
- How To Draw Manga: Characters, Body, Face, And More
Шаги
Метод 1
Метод 1 из 2:
Простой чибик
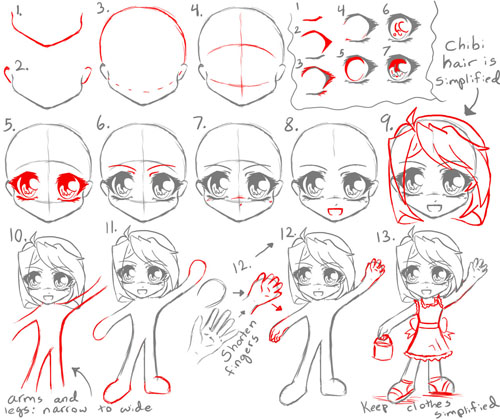
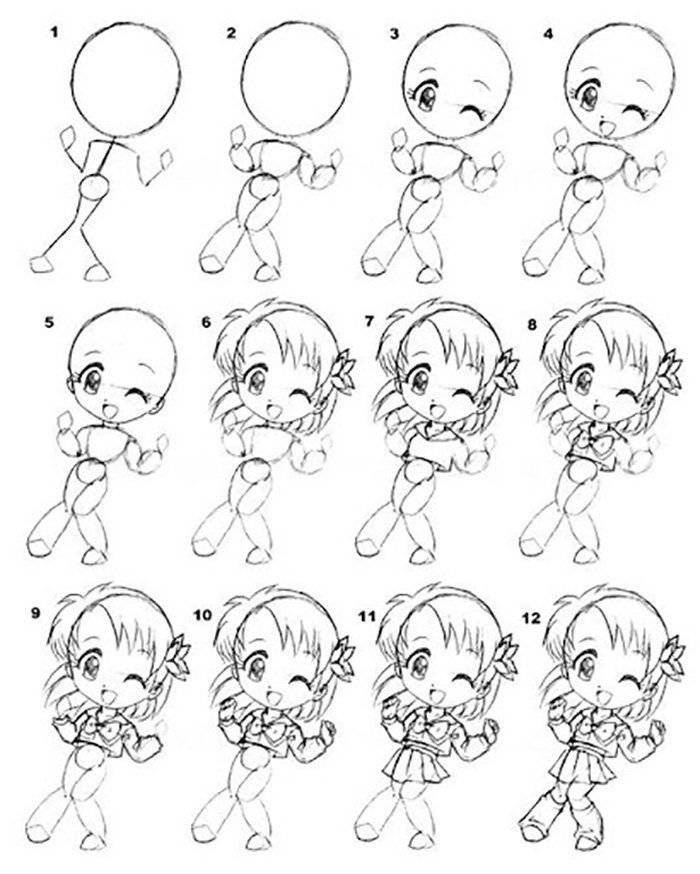
1
Сделайте набросок головы. Нарисуйте большой круг и слегка искривленную линию челюсти. Наметьте центр лица, проведите через него две пересекающиеся кривые линии.
2
Сделайте набросок тела. Рисуя чибиков, тело нужно делать небольшим.
3
Нарисуйте лицо. Рисуйте обычные аниме-глаза, только чуть большего размера. Нос и рот можно изобразить короткими кривыми линиями.
4
Нарисуйте волосы. Пусть все будет просто, без особых художеств. Можно добавить и другие детали – типа заколок.
5
Обведите внешний контур и нарисуйте челюсть и шею.
6
Нарисуйте одежду. Одежда должна быть простой.
7
Нарисуйте руки и ноги. Пальцы можно нарисовать простым зигзагом. В аниме короткие юбки обычно идут в паре с полосатыми чулками – этим приемом можно воспользоваться.
8
Сотрите лишние линии.
9
Разукрасьте рисунок.
Метод 2
Метод 2 из 2:
Рисуем чибика с персонажа аниме
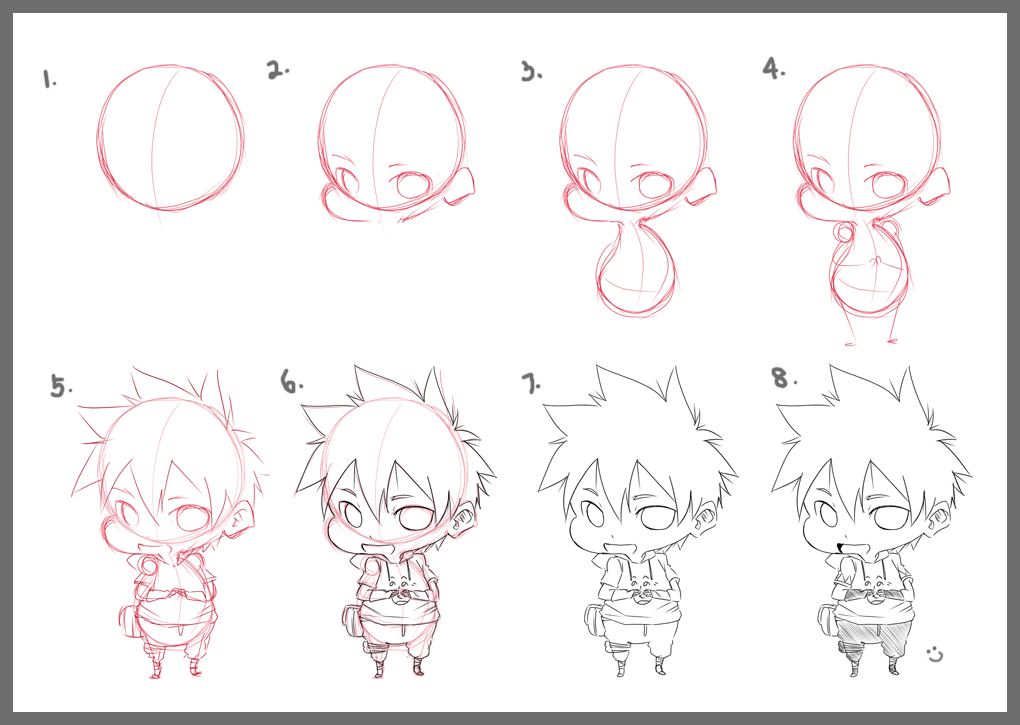
1
Найдите изображение, которое хотите перерисовать в чиби-стиле. В данном случае мы рисуем Наруто.
2
Нарисуйте контур тела. Скопируйте позу персонажа, но учтите – голова должна быть большой. Пока что не надо добавлять деталей, нужен просто контур рук и ног.
3
Нарисуйте лицо. Скопируйте стиль, в котором нарисованы глаза, но сделайте их чуть больше. Так как мы рисуем Наруто, то не забудьте про три линии на щеках с каждой стороны.
4
Скопируйте прическу и повязку.
5
Нарисуйте уши и линию челюсти.
6
Нарисуйте тело. Пусть все будет просто, но узнаваемо.
7
Сотрите лишнее, обведите нужное.
8
Разукрасьте рисунок.
Советы
- Поищите, как рисуются чибики, их глаза и одежда.
- Рисуйте карандашом – так проще стирать лишние линии. Затем обведите чем-нибудь ярким контуры. Кстати, при раскрашивании хорошо покажут себя маркеры.
- Рисуйте разные выражения глаз и лица. Нарисуйте столько разных лиц (или хотя бы глаз-носов-ртов), сколько сумеете придумать. Тренируйтесь и набивайте руку!
- Не забывайте затачивать карандаши.
- Держите руки чистыми, чтобы не оставить пятен на бумаге. Некоторые, кстати, даже перчатки надевают, когда рисуют.
- Рисуйте большие глаза и крохотные носы!
- Упрощайте рисунок!
- На сайтах типа www.gaiaonline.com можно не только многому научиться в плане рисования чибиков, но и даже заработать игровую валюту, продавая свои рисунки игрокам!
- Карандаш и ластик
- Бумага
- Графический редактор, если вы рисуете на компьютере или оцифровываете обычный рисунок.
- Цветные карандаши или маркеры.
Аниме девочка
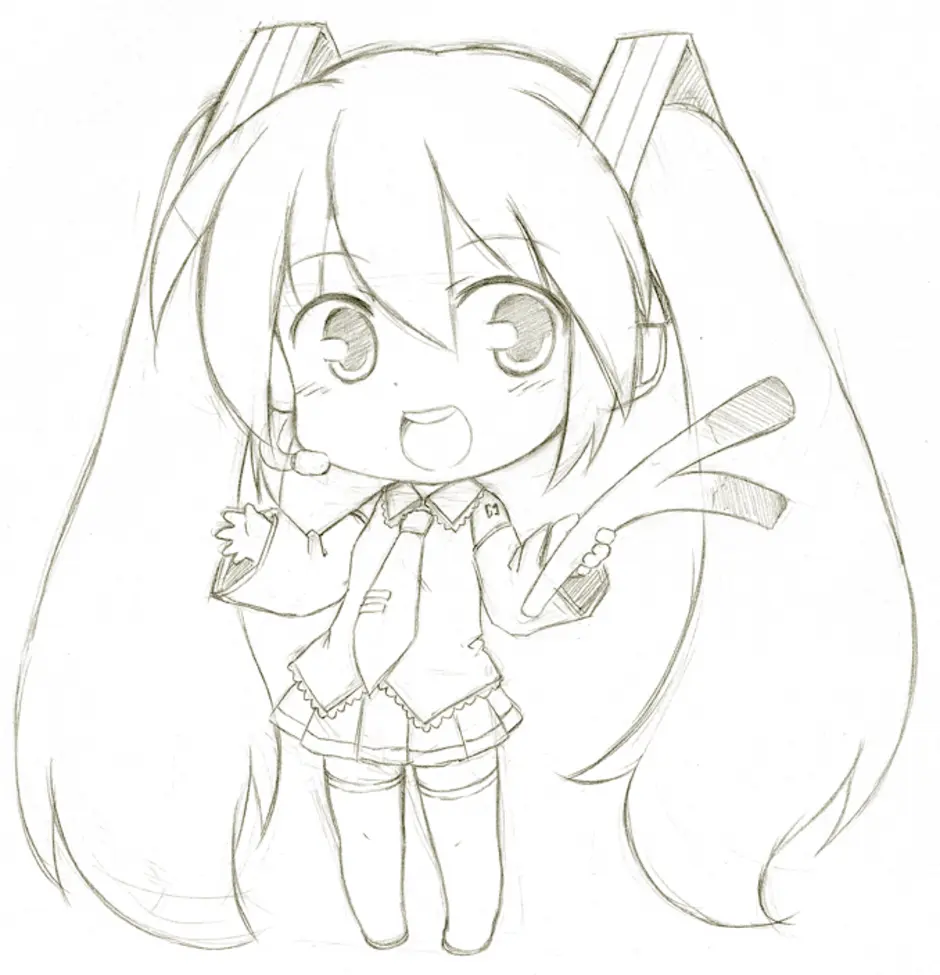
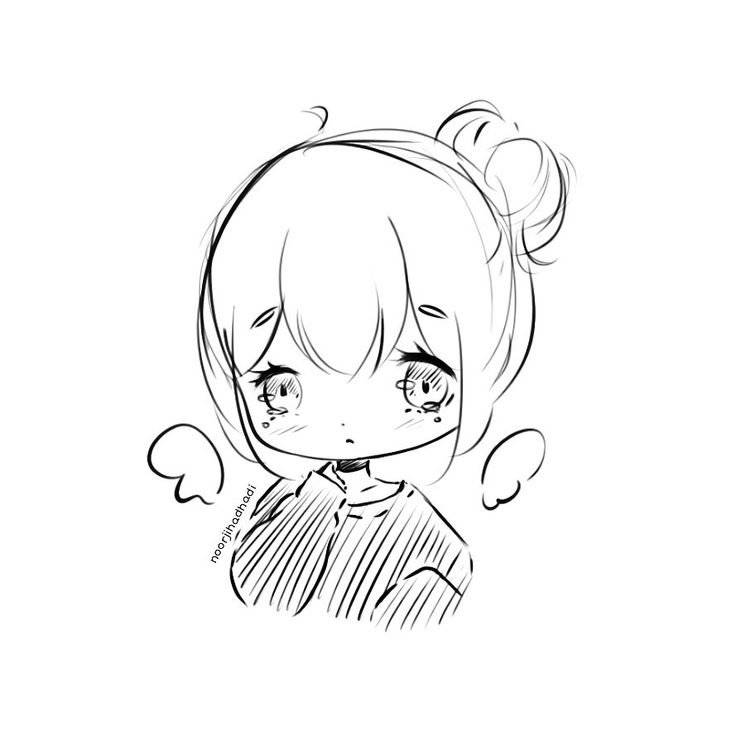
Основной особенностью аниме стиля принято считать небольшие губы и огромные глаза, которые занимают большую часть лица. Чаще именно от их вида зависит итоговый результат. Попробуем сделать картинку с милой девочкой. Желательно в процессе использовать несколько карандашей с разной твёрдостью и ластик. Приступим:
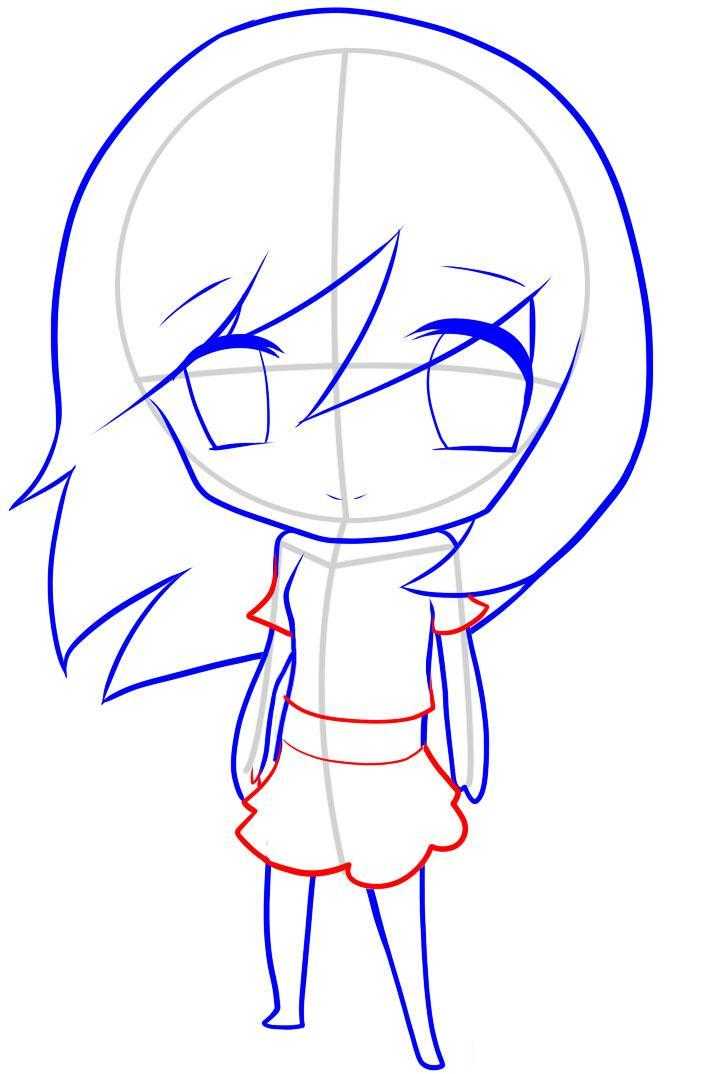
- Начнём с наброска. Проводим вертикальную ось там, где будет располагаться голова. Разделяем её двумя горизонтальными полосами. Обводим эти чёрточки овалом, который внизу слегка сужаем. С правой стороны лёгкими полосами отмечаем волосы, здесь мы изобразим позже косу.
- От полученного контура проводим короткую шею. Сразу намечаем горловину футболки, руки, выходящие из рукавов и контуры верхней области туловища. Руки будут видны не полностью, здесь достаточно провести длинные отрезки, уходящие вниз листа. Располагаем их так, чтобы они оказались спереди одежды.
- Займёмся детализацией причёски. Используя вытянутые треугольники, изобразите чёлку. Старайтесь располагать пряди как можно ближе. Слева локоны будут слегка распущенными, поэтому достаточно провести несколько линий. Справа на намеченном месте изображаем косу, завязываем её и размещаем красивый хвостик. Добавляем украшение в виде бантика. Он может иметь самую простую форму.
- Оформим личико. Вверху делаем большие овальные глаза. Верхнюю область выделяем сильным нажатием на грифель, чтобы получить ресницы. Добавляем зрачки, в которых оставляем блики. Ниже всего одной точкой наметим носик, а рот можно вывести с помощью двух коротких чёрточек.
- Основа готова. Стираем вспомогательный набросок и можно переходить к закрашиванию. Наша картинка будет выполнена только карандашом, но вы можете придать ей цвета. Используйте мягкий грифель для окрашивания и получения более насыщенного тона в результате.
- Заштрихуйте зрачки, оставьте белые блики в центре. Нижнюю деталь делаем серой, чтобы она отличалась от тёмных зрачков. Придаём волосам объём за счёт лёгкого покрытия штрихами справа. Левую можно оставить светлой. Добавим к одежде большой бант и нанесём горошек по всей её поверхности. Закрашиваем одежду оставляя теневые и световые элементы.
Картинка готова.
How to draw chibi body
The proportions come only after you’ve displayed the specific facial layout, as they are the easiest part to reproduce. After this, you can focus on the chibi anatomy.
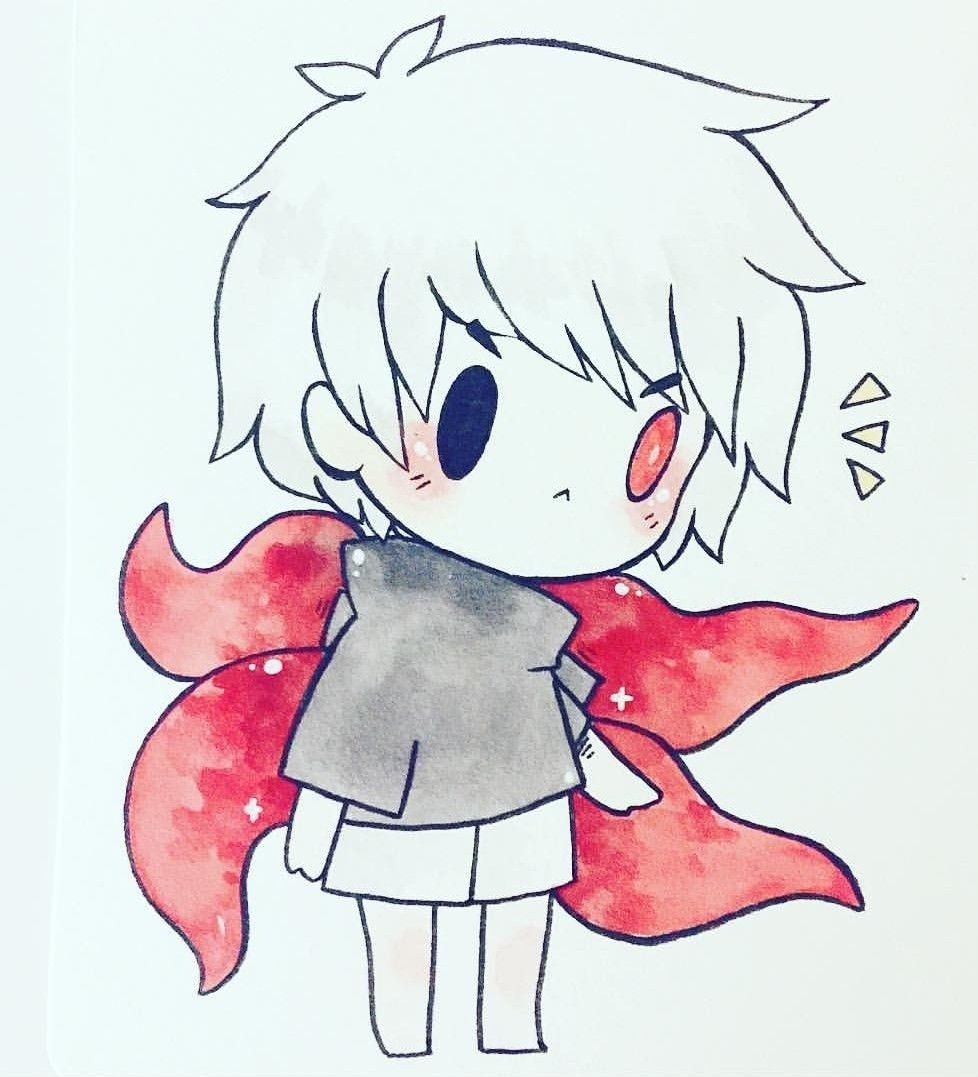
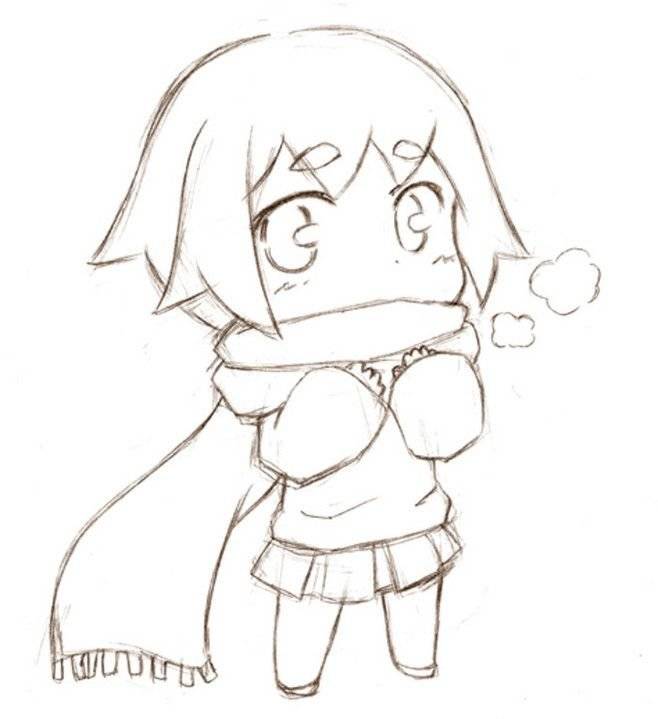
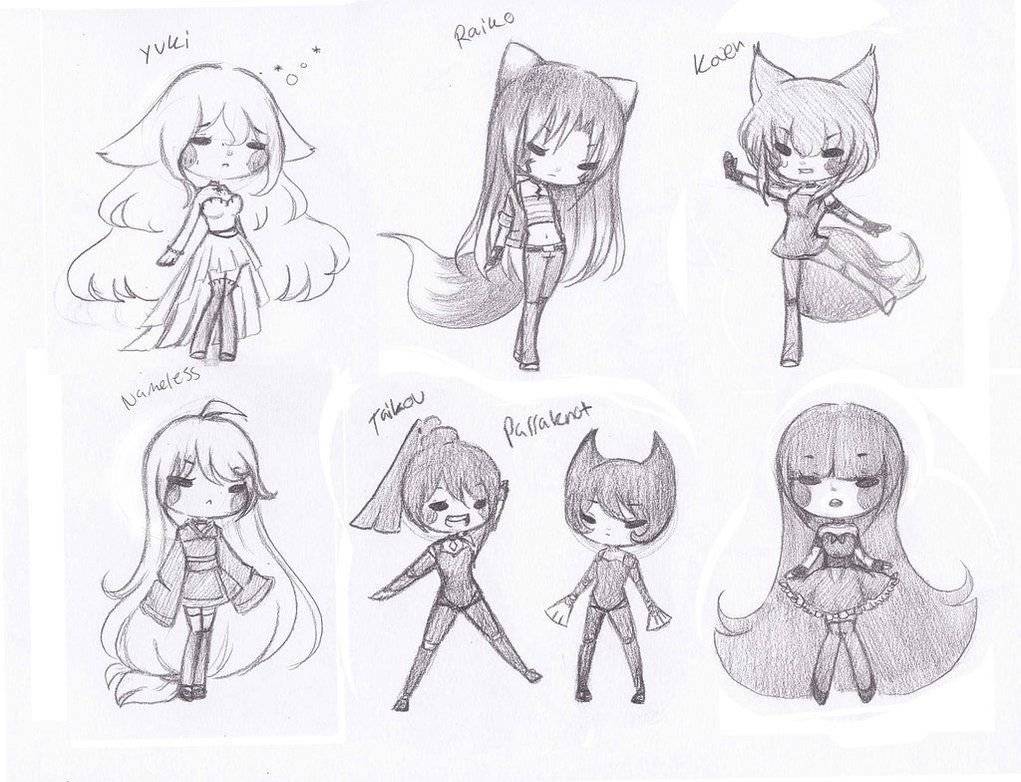
Ideally, the ratio between the body and the head should be 1:1 or 1:4, the head being the bigger part, and the legs being distinctively short. When drawing chibi characters you can use a range of different poses. You could draw an anime girl bowing or a chibi holding something. You could draw your chibi sitting down or create a simple chibi drawing.
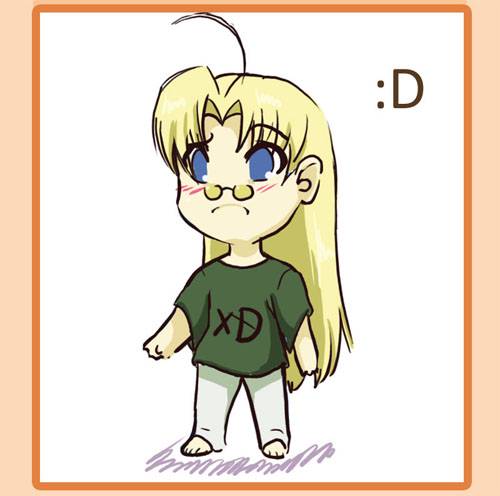
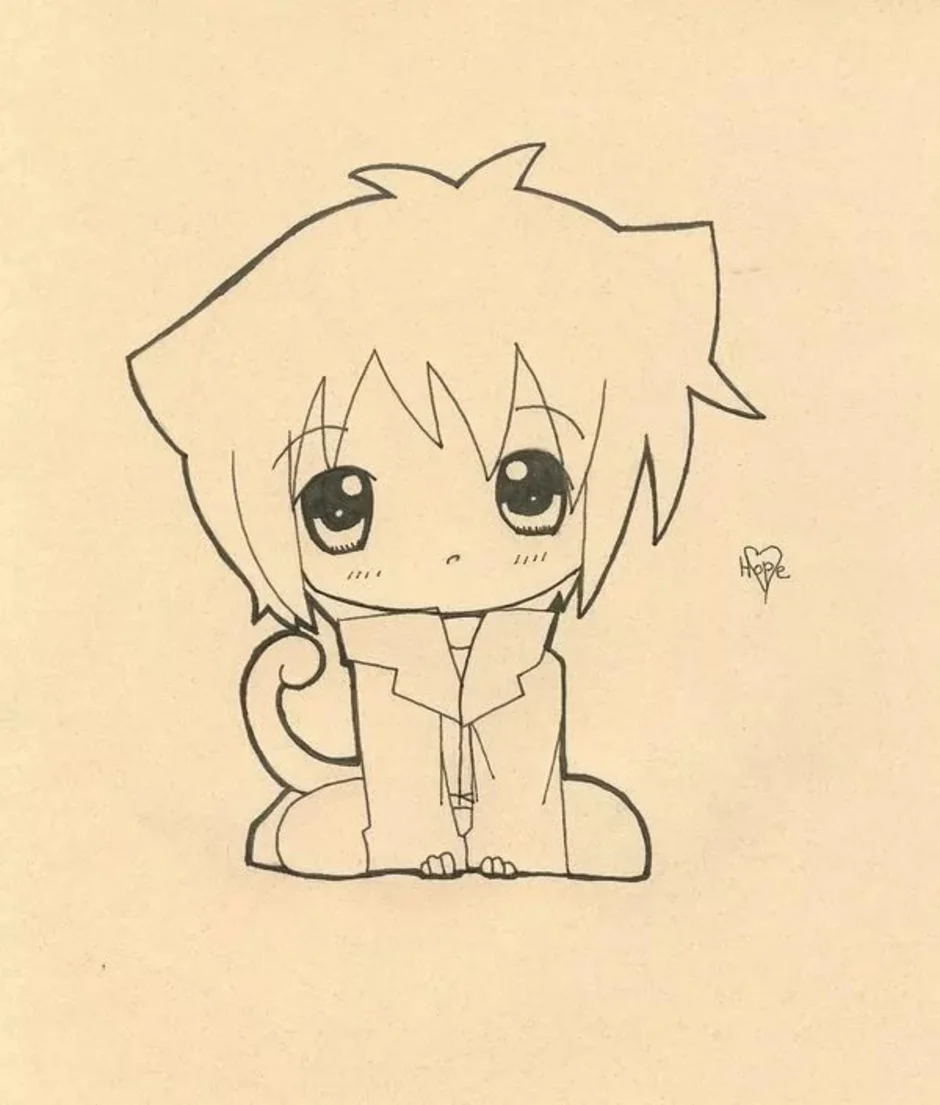
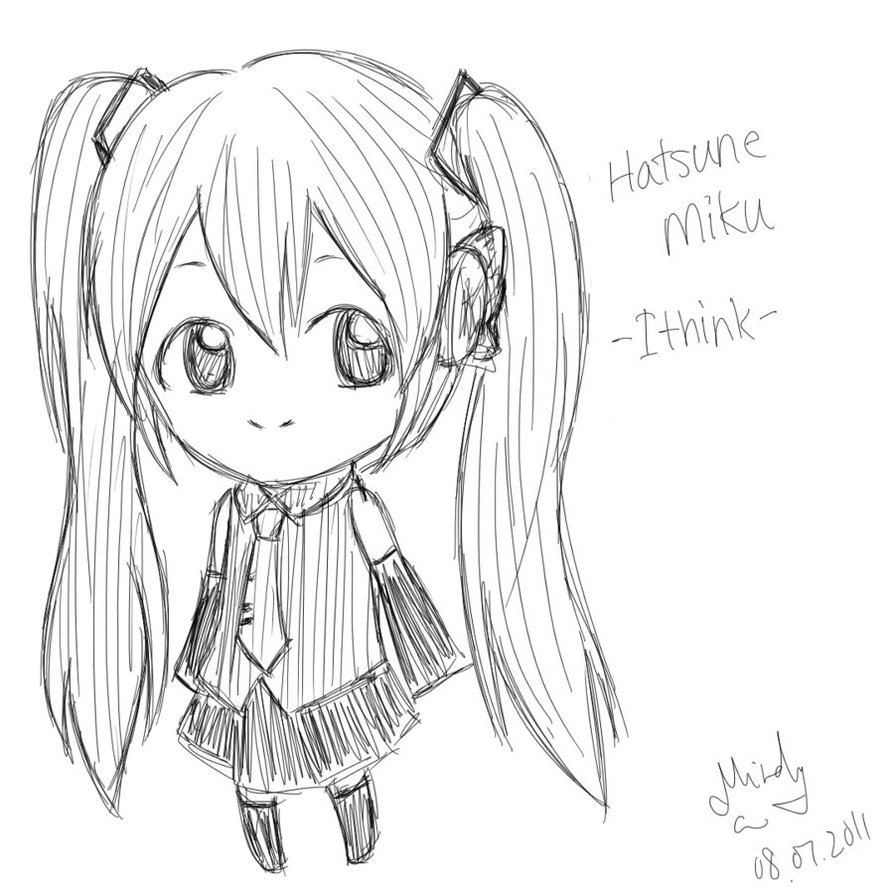
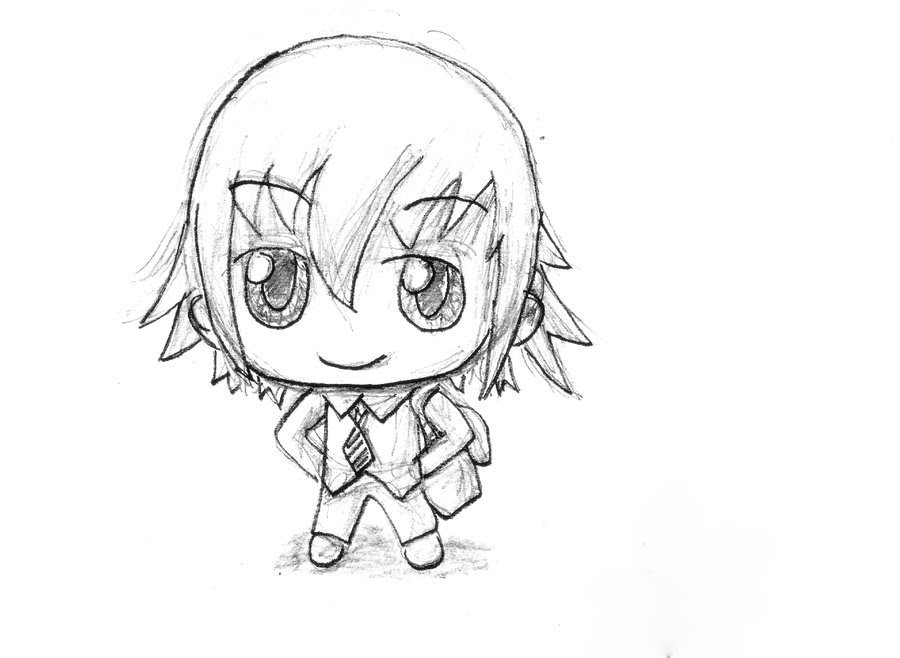
Now let’s see some fine piece of work by different artists. Enjoy the chibi pictures:
In Japanese slang, chibi can be translated as short or small, and it originates from the words “Chitchanabito” or “Chitchana no Hito”. Interestingly enough, Japanese people call children chibi, probably to indicate that they’re ‘small humans’. For what is worth, anime and manga fans seem to really adore this term.
For them, chibi is the word used to describe an animal or a person who is smaller than the rest of his group which means one could use it to describe something that is little or short. Still, it would be a big mistake to say that for an adult in Japan, since they have a rather cute word for the purpose called chiisana.
To be more precise, the word that brought ‘chibi’ in the Western world was the ‘Chibiusa’, the diminutive name of Sailor Moon’s daughter which is nowadays used for pets. Similarly, the Japanese call their pets ChibiUsagi (meaning little rabbit).
The English-speaking manga fandom (otaku) and anime prefer to use chibi for significantly deformed characters. Chibi anime characters often have oversized heads and bodies that are deformed. More often than rare, to draw a chibi means to draw a child as well.
Artists usually draw chibi to depict humorous and cute scenes, but that’s most of the time a single drawing rather than a complete anime series. The common users are ONAs, OVAs, manga, and Maruko-chan inspired series.
How to draw chibi face
As chibi characters are small, the most important tip to remember from this chibi tutorial is to give the face the attention it deserves and to draw it as large as possible.
Round shapes should do for the purpose, but you’re perfectly allowed to alter them according to the look you’re trying to obtain for your anime chibis.

The head, in general, allows more variations than the face. You can use any shape for it, including rounded blobs, rectangles, or even square blocks.
Instead of bothering too much about your chibi proportions, think about the expression: Do you like chibi characters whose cheeks swell up like squirrels? Why not use them? In fact, this is very recommendable technique for making characters look younger and childish.
In order to make your chibi unique, experiment and exaggerate as much as you can. Try to replicate all important characteristics, including large chibi eyes, droopy chin, wrinkly skin, round nose, a full chibi mouth and an interesting chibi hairstyle. The ultimate aim of chibi art is to make the character as funny as possible.
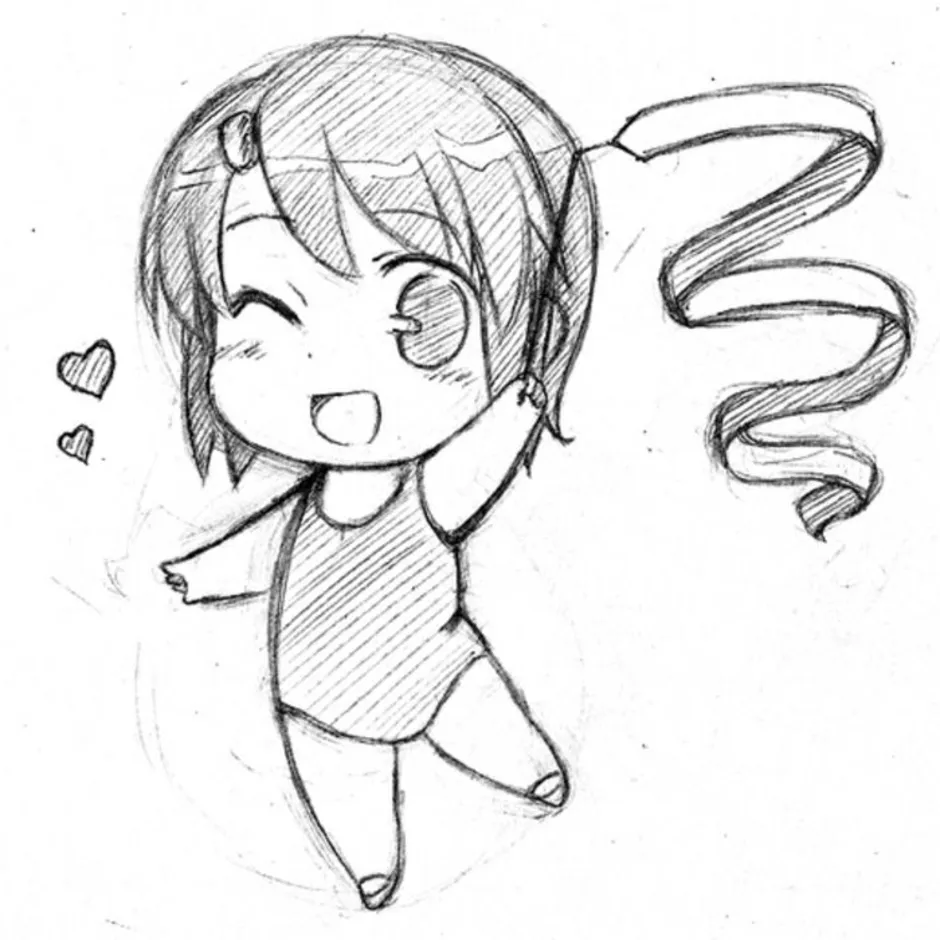
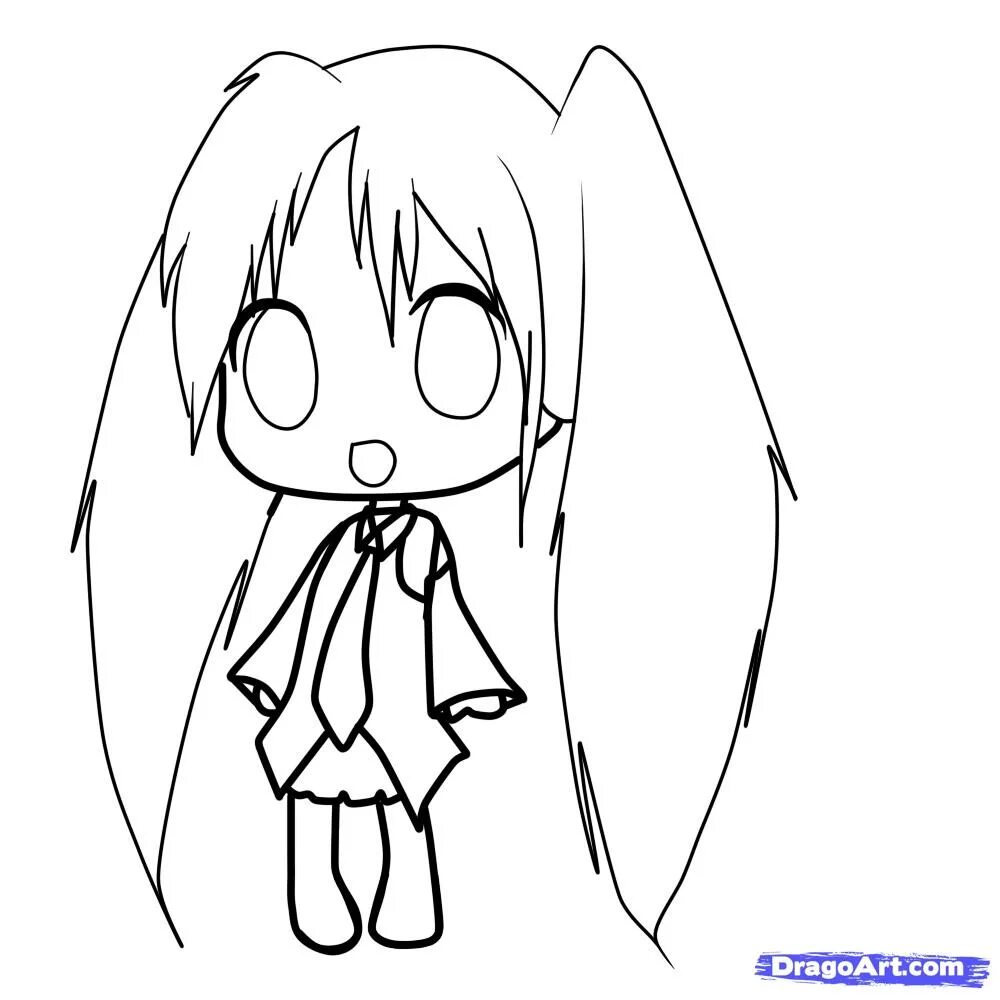
Как нарисовать Чиби
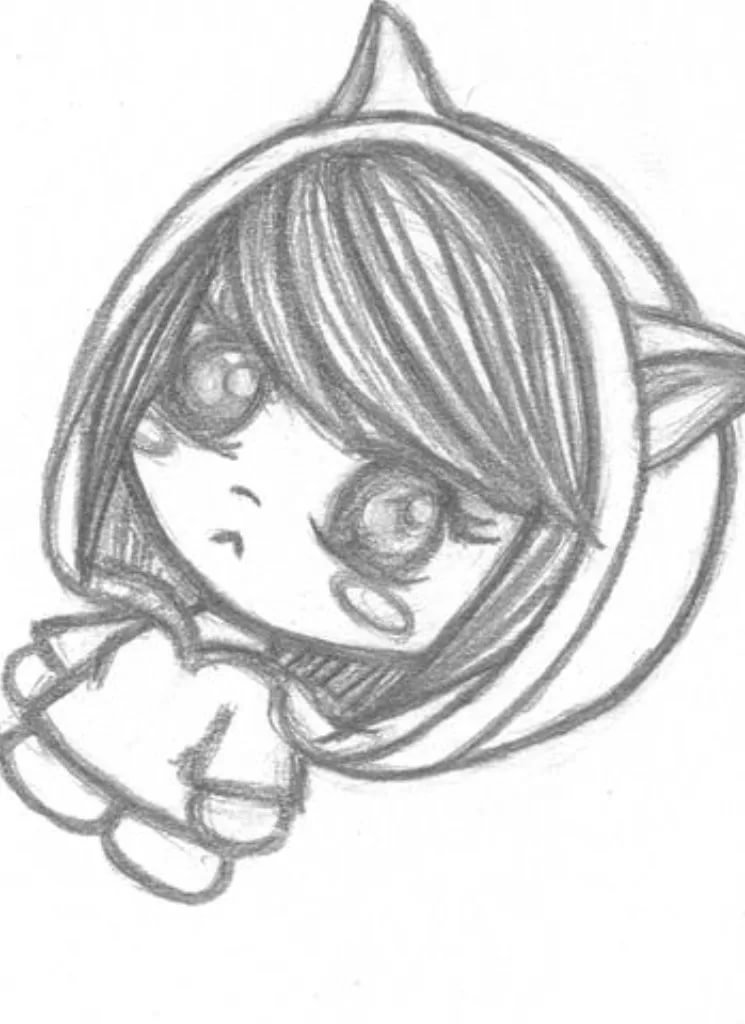
Будем рисовать персонажа из одного мультфильма по имени Чиби. Работа совсем несложная, итоговый результат понравится любителям этого жанра. Перед началом творческого процесса подготовьте карандаш голубого цвета и свой альбом для творчества. Приступаем к творчеству:
- На листе первым делом выводим контур головы этого персонажа в виде овальной фигуры.Делим эту фигуру пополам сначала вертикальным отрезком, а затем ещё раз, но уже горизонталью. Над горизонталью чертим две окружности, это будут глаза персонажа. Над ними добавим брови.
- Уточняем периметр лица на голове и изображаем открытый рот. Под головой штрихами изображаем туловище девушки,если не знаете, как это сделать ориентируйтесь на изображение девушки аниме.
- Берём карандаш чёрного цвета, им повторно уточняем глаза на лице, наводим ресницы, брови и обводим рот. Обязательно ставим блики. На голове делаем набросок контура волос.
- Далее, уточняем туловище, детализируем одежду пуговицами. Дорисовываем персонажу хвост. Декорируем его и заштриховываем чёрным карандашом глаза.
- Теперь дорисовываем на голове ушко как у кошки. Детализируем его и штрихуем левую сторону и второе ухо.
Силуэт готов, теперь вы знаете, как можно изобразить Чиби карандашами. Видите, работа несложная, даже если вы новичок с этой картиной легко справитесь. А наша инструкция вам в этом поможет.
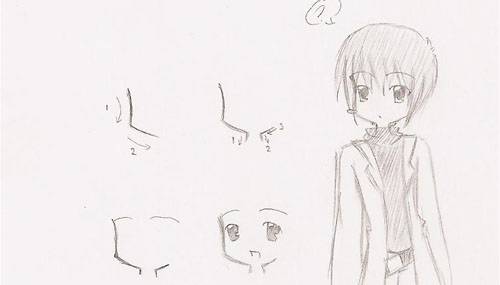
How to draw chibi mouth
Chibi mouths can either be a simple line or a stylized and carefully executed part of your chibi.
Before you’ve started thinking about it, look at the character whose chibi you’ll be drawing: Are there any oversized canine teeth? How does the tongue look? All of these elements will be critical when conveying your chibi’s emotions.
What can be learned from chibi anime drawings is that facial features are perfectly capable of drawing out actions, which is something that can’t happen in real life. For instance, they show you that the mouth can be extra opened while yawning, or that there are lip lines that can capture the very exact moment of sneezing.
How to draw chibi nose
The nose is will hardly ever distinguish your chibi character, which is why many artists decide to take care of it at the very end.
Some of them, as you had the chance to see, would even scratch a small triangle or a dot where the nose is supposed to be. Still, skipping this step will depend only on whether the nose is originally specific, which is why we recommend you to check out some specific drawings.
If the decision to skip the nose is still at stake, think of a symbol you can use to replace it. Our recommendation is to use short lines (shorter than -), dots, circles, or small triangles in your chibi sketch.
On the other hand, if the nose is there and you want to replicate it, make it small and cute. Female chibi characters, in particular, have to have a likable nose, while the general rule is for the nose to ‘grow’ as the character decreases.
How to draw Chibi: Chibi drawing tutorial examples
Even when trying to draw the perfect chibi, you don’t have to make it super deformed. There are many ways to make your own chibi: you can get inspired by authors who like them round and short, or prefer the taller and slimmer chibis.
The decision is up to your taste and style, but in order to know what you’re doing, we recommend you to try out several different versions and choose the type that looks the closest to your favorite chibi drawing.
The common mistake here is that amateur artists perceive chibi to be a simple a task, and undermine important details just because of the fact chibi is smaller than a normal person. Of course, you won’t have enough space to replicate every part of the chibi body, but you can at least try to include all parts that are important.
To skip making serious mistakes, look at the full-sized character, and note down all important details to be included in the chibi version of it.
Рисунок аниме Наруто
Многим любителям мультиков нравится герой Наруто. Они желают его нарисовать, но не знают как это сделать. Этот урок именно для таких людей, в нём мы расскажем как рисовать изображение Наруто. Перед началом урока просим подготовить простой карандаш и альбом для творческого процесса. Подготовили? Тогда приступаем к рисованию.
Рисуем Наруто:
- Примерно посередине листа чертим трапецию. К этой фигуре добавляем дугу. В середине полученного силуэта ставим в центре зрачок. Сразу заштриховываем этот участок. Наводим более жирной линией, веко, проводим отметку вниз и отмечаем горизонтальным отрезком, нижнюю часть второго глаза.
- Чертим ещё трапецию, но узкая часть направляется в сторону носа. Аналогичным образом сам глаз и зрачок. Заштриховываем и этот силуэт. Удлинёнными галочками рисуем брови. Проводим ровную горизонталь вдоль линии лба.
- Теперь, посередине будет нос, а под ним рот. Отмечаем периметр лица. Прямоугольными фигурами показываем уши персонажа.
- Далее, выводим контур повязки. По центру повязки изображаем большой прямоугольник с закруглёнными углами. По бокам фигуры ставим по три небольших окружности. Посередине этой же фигуры начинаем рисовать символ Наруто. Для этого необходимо навести форму улитки, книзу дорисовать треугольник и поставить вертикальную черту в начале улитки.
- Затем дорисовываем несколько прядей волос и шею героя. Возле шеи обозначим ещё несколько прядей волос. С левого и правого бока головы будет воротник одежды. Детализируем этот участок, чтобы получить его объёмным.
- Уточняем лицо и приступаем к штрихованию. Заштриховываем повязку, шею и немного лицо.
Готово. Так вы узнали как изображать аниме Наруто и убедились, что в этой работе нет ничего сложного. Всё что от вас требуется – это придерживаться инструктажа.
How to draw chibi eyes
Another thing to remember from this chibi drawing tutorial is that eyes need to be large. In case you’ve decided to make them smaller, try at least to make them more character-specific.
When thinking about how to draw chibi eyes, include as many details as you can. Even if you perceive the task as simple, the details may be more challenging than you expected: Will there be a fold above the lids?
Are you going to include eyelashes?
Which is the best way to shade the irises to resemble the light reflection pattern?
Are there any larger wrinkles to include?
The expressions are the core of your anime chibi drawing, but they are hardly ever realistic. Therefore, use your imagination and play around instead of worrying whether your character looks genuine or not.
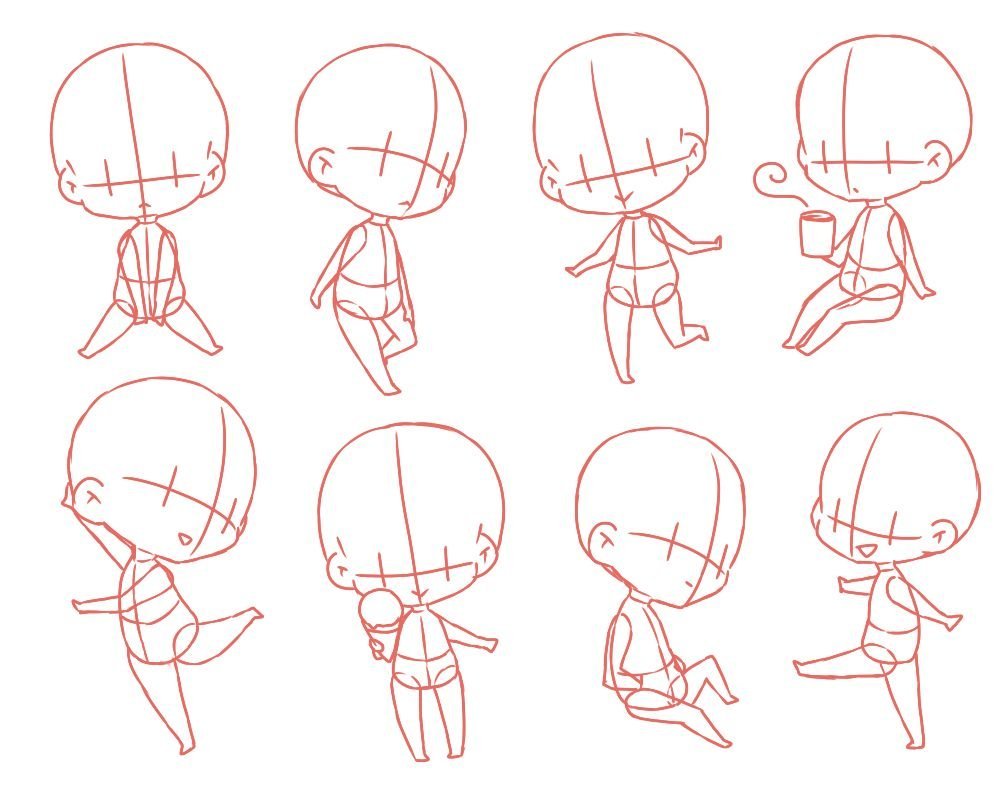
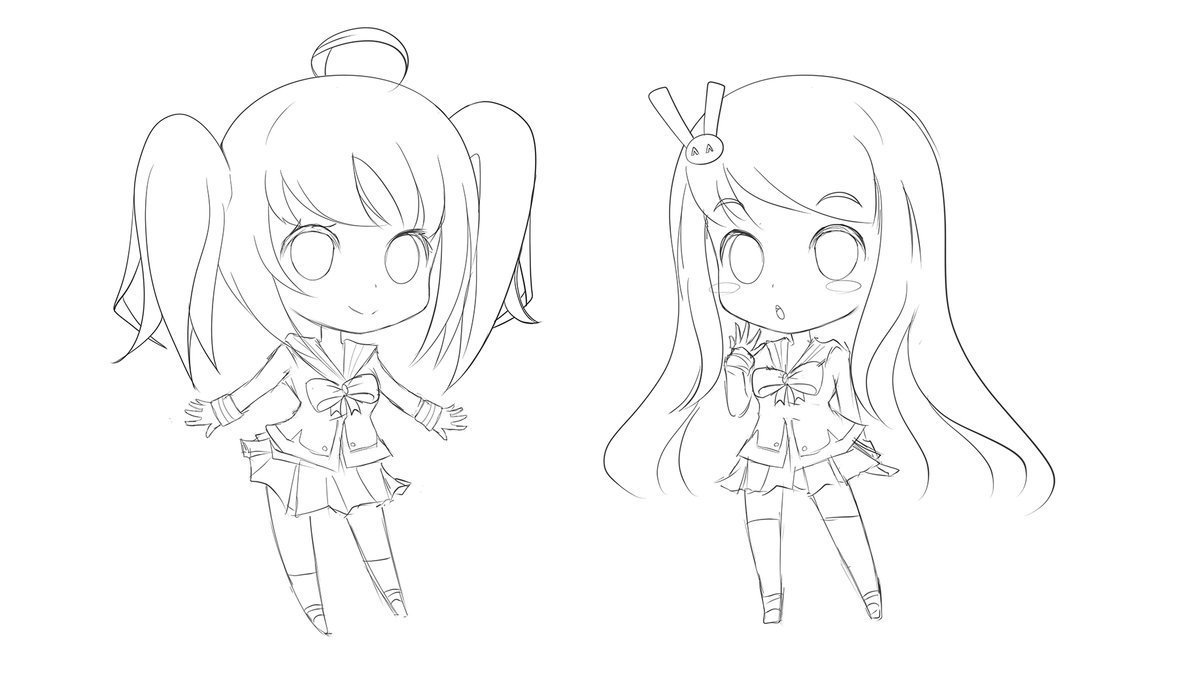
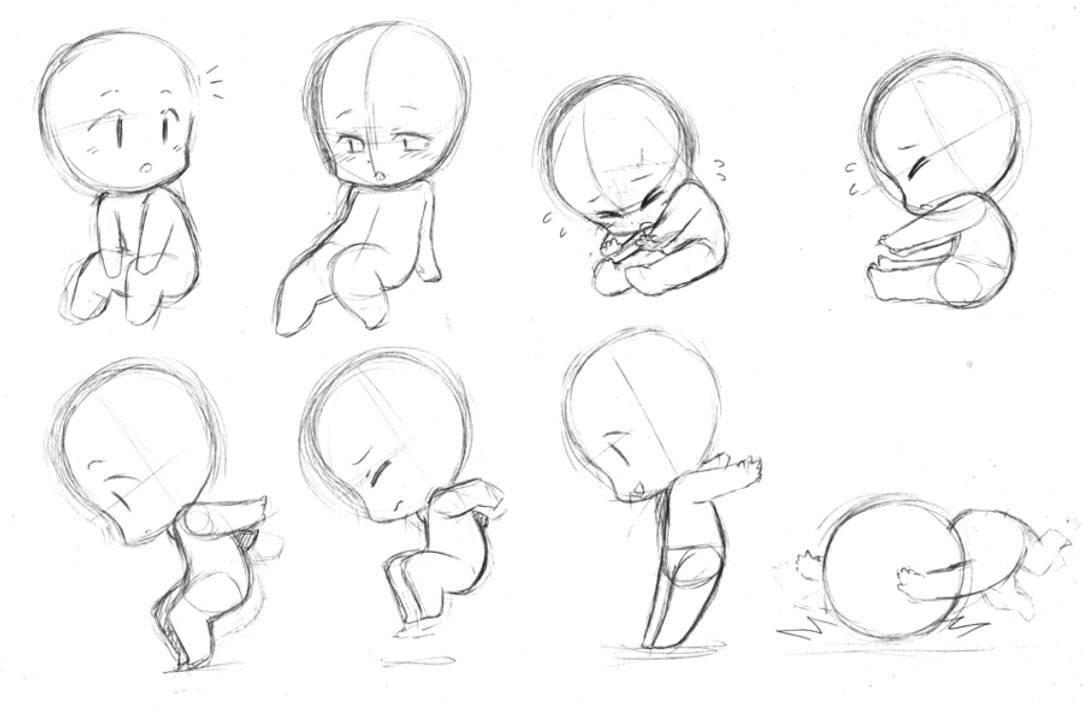
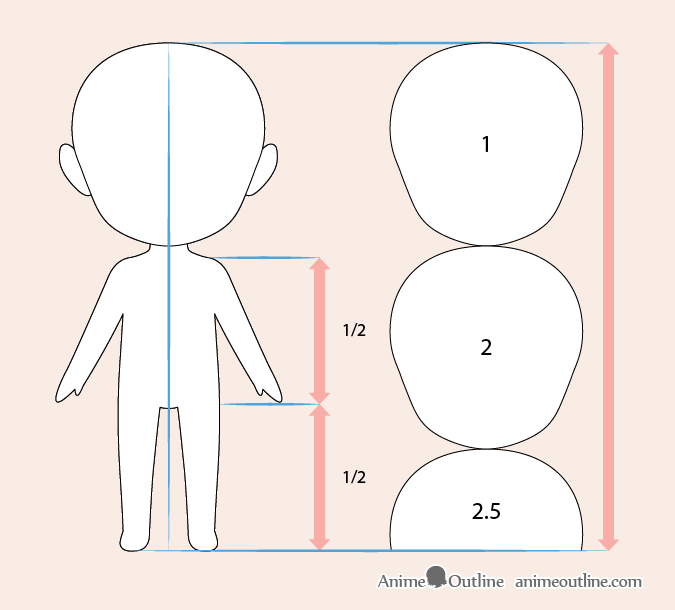
Step 1 – Establish the Body Proportions
 Chibi anime body proportions drawing
Please note that the body proportions in the above example are just a suggestion as there is no one set way to draw chibi bodies. Some can have absolutely huge heads as big as the body and some can be closer to more standard anime characters.
To follow this example draw the character’s body as tall as one and a half of their heads. Draw the torso the same legs to be the same height.
The hands and feet of chibi characters can often be drawn without showing the individual toes or fingers.
For this particular style draw the thumb without the details of the fingers (as though the character is wearing mittens).
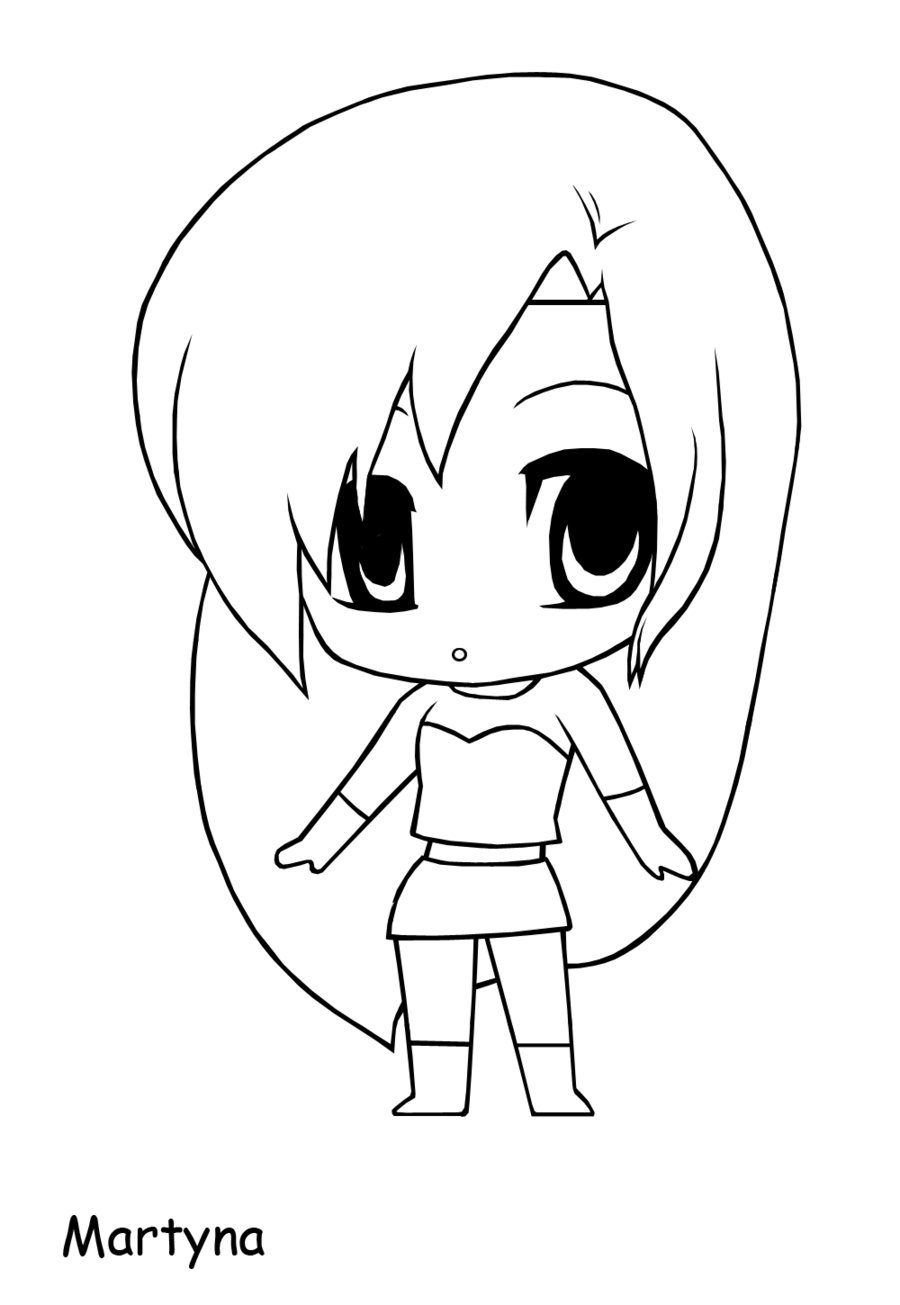
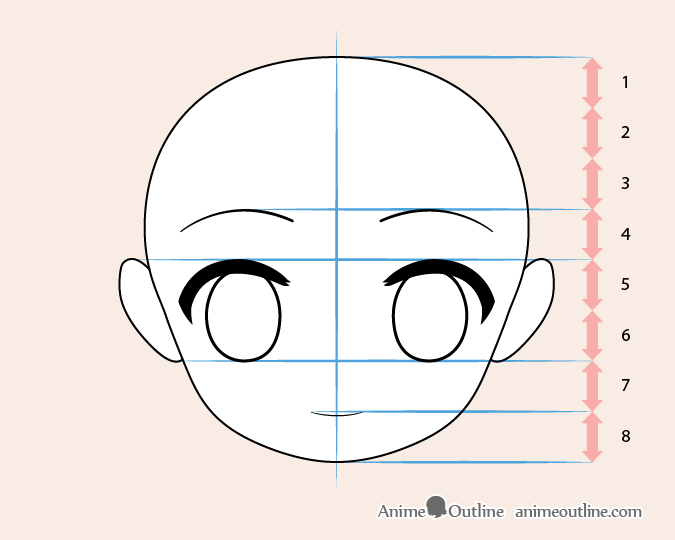
Step 2 – Draw the Face
 Chibi anime girl face proportions drawing
Please note that these proportions (just like those for the body) are only suggestions.
To place the facial features using the proportions in this tutorial draw as follow:
- Draw a horizontal line through the middle of the head and draw the eyes and ears below that line (draw them as tall as 1/4 of the face or two of the division in the above example)
- Draw a horizontal line between the bottom of the eyes and the chin and draw the mouth below that line.
- Draw a horizontal line 1/8 of the face in height (one division in above example) up from the top of the eyes and draw the eyebrows below that.
As is often the case for chibi characters you can avoid drawing the nose all together.
Please also note that though the ears are provided as a reference they will be covered by the hair in later stages of the tutorial.
For drawing other types of anime heads see:
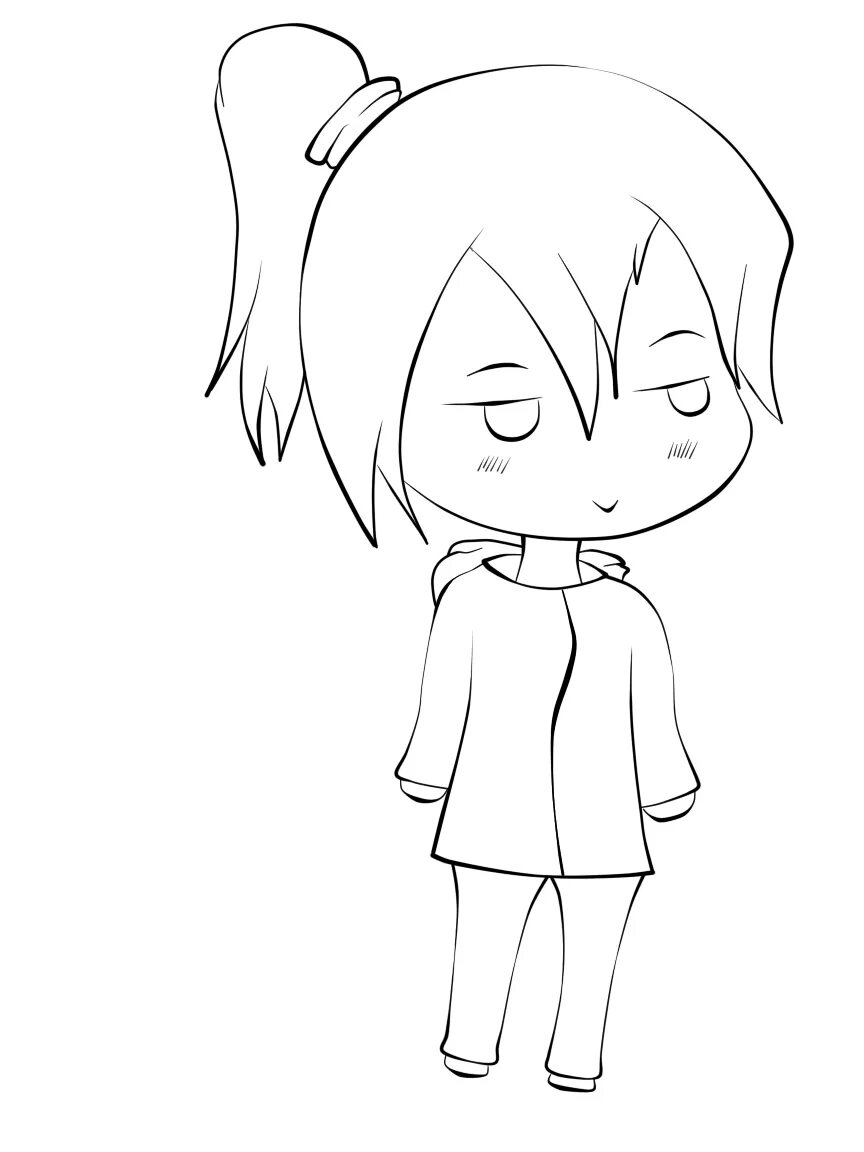
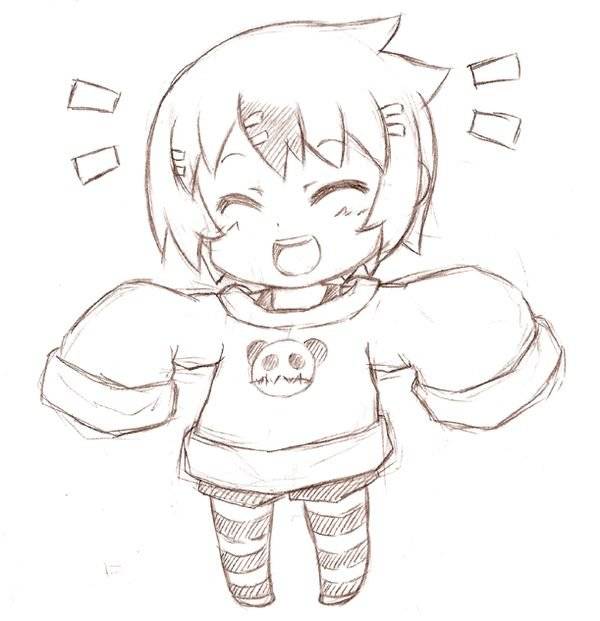
2. Рисуем Девочку Чиби в Наряде для Вечеринки
Шаг 5
Добавьтеаксессуары к наряду – забавную обувь и милые украшения. Не делайте эти деталислишком сложными; они должны соответствовать простому стилю всего образа Чиби.
Шаг 6
Теперьдавайте нарисуем волосы Чиби. Это в основном волосы Манга, очень простые.Нарисуйте “шлем” вокруг головы. Необходим некоторый объём, чтобы стрижкавыглядела мягкой и лёгкой.
Теперьвы можете добавить заключительные тёмные линии ко всему изображению. ДевочкаЧиби готова пойти на вечеринку!
Обратитевнимание, что брови всё ещё видны под чёлкой. Это стилизация, характерная для Манги:такие же выраженные, как и волосы, они не должны выглядеть полностью непрозрачными
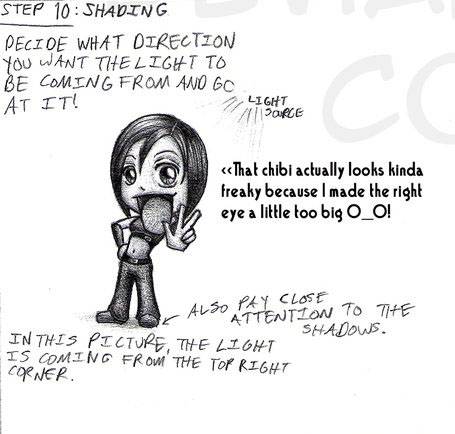
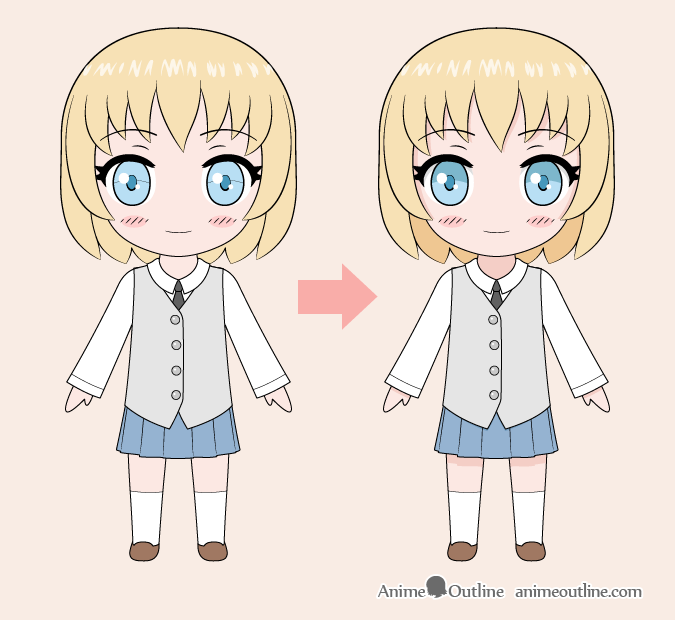
Step 6 – Applying Color & Shading
 Chibi anime girl color drawing
Start by filling in each area with the appropriate color. If you are coloring on paper be sure to leave the reflections in the eyes, hair, and buttons white. If coloring digitally add them in at the end.
You will then want to shade in the following way:
- Darken the neck
- Add some drop shadows on the face (from the hair)
- Add a shadow on the legs (form the skirt)
- Add some tiny shadows on the hands from the sleeves
- Darken the top of the irises of the eyes
- Add some very small shadows to the top of the white areas of the eyes (from the eyelashes)
For the neck you can just darken the entire area for the rest of the shadows make draw them roughly tracing the shape what is casting them (hair/skirt/sleeves/eyelashes). For the darker top of the eyes you can use the line from the previous step to separate the dark and light parts.
For more on coloring an anime or manga character see:
FAQ about chibi drawing tutorials
What’s the best way to start learning chibi drawing?
Well, my friend, the key is to begin with the basics. Start by familiarizing yourself with chibi proportions and the typical large head-to-body ratio. It’s good to practice simple shapes and body structures first. Look for beginner-friendly tutorials online, and try out different drawing styles to find the one that suits you best. And of course, practice, practice, practice!
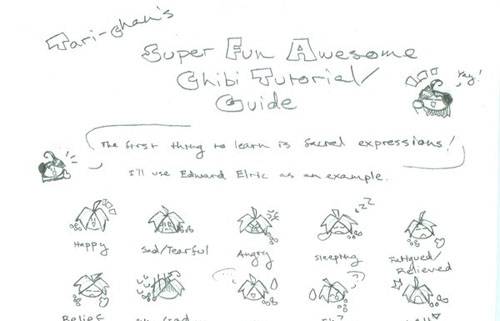
How can I make my chibis look more expressive?
Ah, that’s a fun one! To give your chibis more personality, focus on their facial expressions and body language. Play around with different eye shapes, mouth positions, and eyebrow placements. You can even exaggerate these features for more impact. Remember, chibis are all about cuteness, so make sure to keep it light-hearted and adorable.
What materials do I need for chibi drawing?
You know what, you don’t need anything fancy to get started. Just grab some pencil and paper! As you progress, you may want to invest in drawing pens, markers, or even a drawing tablet for digital art. But for now, keep it simple and focus on honing your skills.
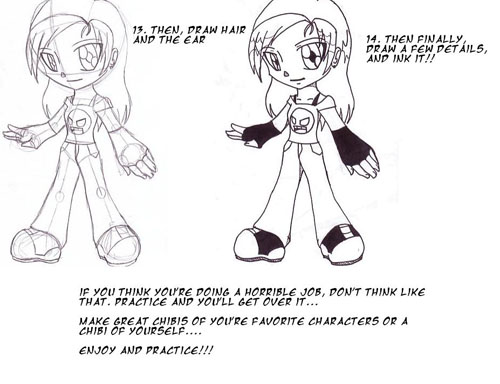
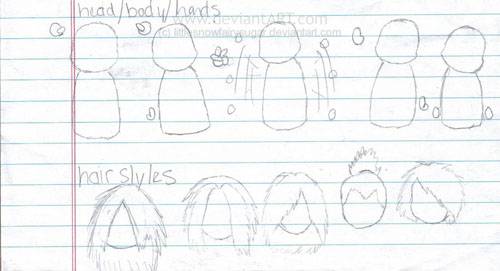
How do I draw chibi hair?
Oh, chibi hair can be a bit tricky, but it’s all about breaking it down into manageable sections. Start by sketching the hairline and then create the larger shapes that make up the overall hairstyle. Add details like individual strands and highlights to give it texture and depth. Remember, chibi hair should be exaggerated and playful, so don’t be afraid to go big!
Can I draw chibi animals or objects?
Absolutely! Chibi style isn’t limited to humans. You can apply the same cute proportions and exaggerated features to animals, objects, or even mythical creatures. Just make sure to maintain the signature chibi look with large heads, small bodies, and expressive faces.
What are common chibi body proportions?
Chibi proportions are distinctly different from regular human proportions. Typically, a chibi character’s head is about one-third to one-half the height of their entire body. This gives them that cute, child-like appearance. Keep limbs short and stubby, and don’t forget those oversized eyes!

How can I improve my chibi drawing skills?
To improve, it’s essential to practice consistently. Draw as much as you can and experiment with different techniques. Learn from other artists by studying their work and trying out their methods. And don’t be too hard on yourself; progress takes time, so be patient and enjoy the journey.
Can I create my own chibi characters?
Of course! That’s the beauty of art; you can create anything you imagine. Just remember to maintain chibi proportions and characteristics when designing your original characters. Play around with different outfits, hairstyles, and expressions to make them truly unique.
Are there any good chibi drawing tutorials online?
Yes, there are tons of resources available online. Look for tutorials on YouTube, DeviantArt, Pinterest, or even Instagram. Many skilled artists share their knowledge and techniques through step-by-step guides or video demonstrations. Find the ones that resonate with you and learn from them.
How do I add color to my chibi drawings?
Coloring your chibi drawings can be done in many ways. You can use colored pencils, markers, or even digital tools. Start by laying down flat colors as your base, then add shading and highlights to create depth. Experiment with different color palettes and blending techniques to find the style that works best for you.
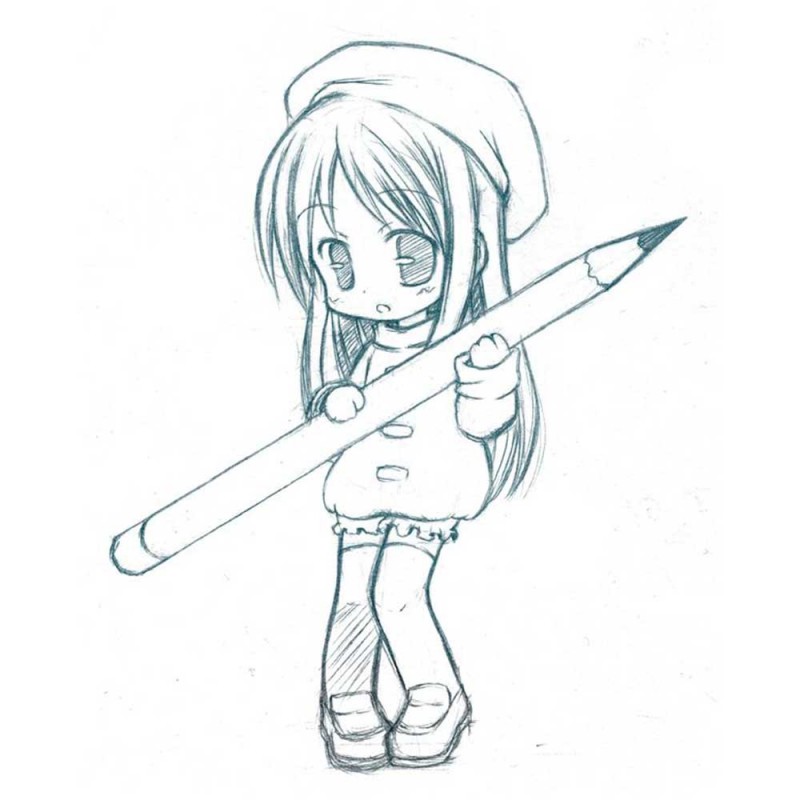
1. Рисуем Основу Чиби
Наносимыелинии должны быть едва уловимыми, таким образом, вы сможете обвестизаключительные контуры более тёмными линиями позже.
Шаг 1
Нарисуйтекруг. Он не должен быть идеальным —не обязательно рисовать круг с помощью однойнепрерывной линии. Помните, что чем меньше рисунок, тем легче нарисовать подобнуюфигуру.
Шаг 2
Нарисуйтелинию под кругом, примерно такой же длины, как и диаметр круга. Это поможет намопределить землю под персонажем. Имейте в виду, что это классическая пропорциядля чиби, но её можно изменить, чтобы создать желаемый эффект.
Добавьтеладони…
… ибольшие пальцы.
Шаг 14
Нарисуйтедва круга на грудную часть, чтобы создать грудь. Не делайте их слишком большими- все тело Чиби должно быть маленьким.
Шаг 15
Пришловремя для огромных глаз Манга! У Чиби они не должны быть слишком сложными, хотяони всё равно должны быть выразительными. Нарисуйте две кривые в верхней половинелица.
Иллюстрация Как Нарисоватьи Раскрасить Глаза в Стиле Аниме в Adobe Photoshop Dean Carianas-Mannar
Шаг 20
Когда работанад лицом почти завершена, мы можем спокойно поработать над глазами. Добавьтедва овала в область, которую мы подготовили для них. Это радужные оболочки.
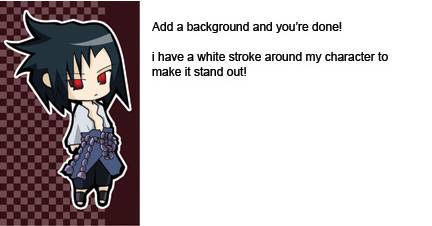
Шаг 25
Есливы хотите завершить свой рисунок сейчас, то возьмите более тёмный инструмент /перейдите на другой слой, а затем обведите заключительные линии. Если вы хотитедобавить ей наряд, тогда пропустите этот шаг.